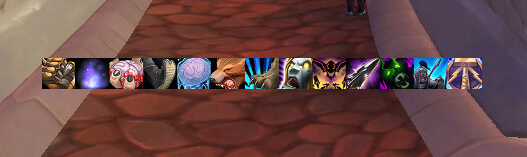
Frost Death Knight is a burst-oriented PvP specialization built around Frost Strike, Howling Blast, Killing Machine and strong control through Chains of Ice, Death Grip and Hungering Cold. The specialization deals a large portion of its pressure as Frost damage, allowing it to threaten heavily armored targets while still maintaining strong physical damage through weapon attacks and Obliterate.
1. Talents
Death Knight Talents (WotLK)Blood13 points
Frost55 points
Unholy3 points
2. Glyphs
Major Glyphs
Minor Glyphs
3. Stats
Hit: 2%(65.6)
Expertise: 10-15
Arp: As much as you can via gear
Crit: ~30%
Resilience: minimum 900
Spell Penetration: 130-140
4. Enchants
- Head: Arcanum of Triumph
- Shoulders: Inscription of Triumph
- Back: Enchant Cloak - Spell Piercing
- Chest: Enchant Chest - Exceptional Resilience / Enchant Chest - Powerful Stats
- Wrists: Enchant Bracers - Greater Assault
- Hands: Hand-Mounted Pyro Rocket / Hyperspeed Accelerators
- Waist: Eternal Belt Buckle
- Legs: Earthen Leg Armor
- Feet: Nitro Boosts
- Main hand: Rune of Razorice
- Off hand: Rune of Razorice
5. Gems
Meta gem: Persistent Earthsiege Diamond / Chaotic Skyflare Diamond
Red gems: Bold Cardinal Ruby
Yellow gems: Mystic King's Amber / Inscribed Ametrine / Resplendent Ametrine
Blue gems: Stormy Majestic Zircon
6. BIS
Forst PVP
7. Macros
8. Food and flasks
Food: Fish Feast / Dragonfin Filet
Pet food: Spiced Mammoth Treats
Flask: Flask of Endless Rage
Potion: Free Action Potion
9. Professions
Priority list:
Stats and gearing
This setup uses around 2% Hit, or approximately 66 Hit Rating.
Nerves of Cold Steel provides an additional 3% melee Hit while dual wielding, bringing melee special attacks to the normal 5% PvP Hit requirement against equal-level players.
Around 10–15 Expertise improves the reliability of Frost Strike, Obliterate and other melee attacks against targets that can dodge or parry.
Strength is the primary offensive stat because it increases Attack Power and improves both weapon-based and Frost abilities.
Armor Penetration can be taken through high-quality gear, but it should not be treated as a mandatory cap. Obliterate and melee attacks benefit from Armor Penetration, while Frost Strike, Howling Blast and other Frost damage do not.
Around 30% Critical Strike provides a strong offensive baseline.
At least 900 Resilience gives enough durability to survive enemy burst while maintaining an aggressive gear setup.
Around 130–140 Spell Penetration helps Frost abilities overcome resistance effects and improves the reliability of Howling Blast, Frost Strike-related Frost damage, Chains of Ice and other magical pressure.
Weapon setup
Frost PvP uses dual wielding with two one-handed weapons.
Slow weapons are preferred because strong individual weapon hits improve Obliterate, Frost Strike and general melee pressure.
This setup uses Rune of Razorice on both weapons.
Razorice adds Frost damage to weapon attacks and causes melee swings to apply Frost Vulnerability.
Frost Vulnerability increases Frost damage dealt to the target by 2% per stack, up to five stacks for a total of 10%.
Double Razorice helps build the stacks quickly after connecting to a new target.
Maintain melee uptime whenever possible so Frost Vulnerability remains active during burst.
Frost Presence and Unholy Presence
Unholy Presence is useful when mobility and faster global cooldowns are more important.
The movement-speed bonus helps Frost stay connected to targets and improves the ability to switch between enemies quickly.
Frost Presence provides significantly more durability and should be used when the enemy team is committing strong physical pressure.
Switch according to the situation rather than remaining in one Presence throughout every match.
Use Unholy Presence when creating pressure and Frost Presence when survival becomes the priority.
Frost Fever
Keep Frost Fever active on the current target.
Frost Fever contributes sustained damage and enables Glacier Rot, increasing damage from Icy Touch, Howling Blast and Frost Strike against diseased enemies.
Chains of Ice can apply Frost Fever while simultaneously slowing the opponent.
If Glyph of Howling Blast is used, Howling Blast also applies Frost Fever to every target it hits.
Maintaining the disease is therefore easy without sacrificing control.
Chains of Ice
Chains of Ice is one of Frost's most important PvP abilities.
It applies a powerful movement slow that begins at 95% and gradually weakens over its duration.
Use it to prevent ranged targets from escaping, peel melee attackers away from teammates or stop an opponent after they use a movement cooldown.
Chains of Ice also applies Frost Fever, giving it both control and offensive value.
Repeated Chains of Ice can make Frost extremely difficult to kite when Rune management is handled correctly.
Do not use every Frost Rune on damage if an important Chains of Ice may be required immediately afterward.
Frost Strike
Frost Strike is the primary Runic Power burst ability.
It deals Frost damage based on weapon damage and benefits from Frost Vulnerability, Glacier Rot and Killing Machine.
Glyph of Frost Strike reduces its Runic Power cost by 8, allowing significantly more Frost Strikes during sustained pressure.
Use Frost Strike aggressively when Runic Power is available, particularly during Killing Machine procs.
Unlike earlier versions of the ability, Frost Strike in WotLK 3.3.5a can be dodged, parried and blocked, which gives Hit, Expertise and correct positioning additional importance.
Avoid capping Runic Power because additional generation is wasted.
At the same time, preserve enough Runic Power when Hungering Cold or another resource-dependent ability will soon be required.
Killing Machine
Killing Machine causes melee attacks to occasionally make the next Icy Touch, Howling Blast or Frost Strike a guaranteed critical strike.
In single-target pressure, Frost Strike is usually an excellent way to consume the proc.
Howling Blast becomes particularly valuable when multiple enemies can be hit.
Track Killing Machine clearly and avoid wasting the proc on a low-value ability when a stronger burst opportunity is immediately available.
Because the proc lasts long enough to react, it can sometimes be held briefly while positioning for a better Howling Blast or Frost Strike.
Do not hold it so long that another Killing Machine opportunity is wasted.
Howling Blast
Howling Blast provides powerful instant Frost damage at range and also damages enemies near the primary target.
It is especially effective during target switches or when melee contact is temporarily impossible.
Against grouped opponents, one Howling Blast can create significant cleave pressure.
Killing Machine can guarantee a Howling Blast critical strike, making the combination particularly dangerous when several targets are close together.
Glyph of Howling Blast causes the ability to apply Frost Fever to every target hit.
This allows Howling Blast to combine burst damage, disease application and multi-target pressure in one global.
Hungering Cold
Hungering Cold is one of Frost's strongest control tools.
It freezes enemies within 10 yards for up to 10 seconds and applies Frost Fever.
Any damage other than disease damage breaks the effect.
Use it to control multiple opponents, interrupt an enemy team's offensive push or isolate one player while your team attacks another.
Glyph of Hungering Cold reduces its Runic Power cost by 40, effectively removing the normal 40 Runic Power requirement.
This makes Hungering Cold much easier to use without sacrificing the Runic Power needed for Frost Strike pressure.
Stop unnecessary auto-attacks and communicate with teammates before using it so the freeze is not immediately broken.
Hungering Cold setups
Hungering Cold can create powerful offensive setups when several opponents are stacked.
Freeze the enemy team, reposition and then prepare your burst before breaking the control.
A Killing Machine or Deathchill Howling Blast can create heavy immediate pressure as the target leaves Hungering Cold.
It can also be used defensively to stop both enemy DPS while your healer recovers.
Do not treat Hungering Cold only as an AoE damage setup. Its ability to temporarily remove several opponents from the fight is often more valuable than the damage that follows it.
Obliterate
Obliterate is the main heavy physical Rune attack.
Use it when both diseases are active and the target can be reached safely.
It benefits strongly from weapon damage and Armor Penetration.
Unlike Frost Strike and Howling Blast, its damage is physical, giving Frost a useful mixture of damage schools.
Obliterate can also trigger Rime, creating a free Howling Blast.
Do not spend Frost and Unholy Runes on Obliterate if Chains of Ice, Death Strike or another utility ability is more important at that moment.
PvP Rune usage should always adapt to control and survival requirements.
Rime
Obliterate has a chance to trigger Rime.
Rime resets Howling Blast and makes the next Howling Blast cost no Runes.
Use these free casts to maintain pressure without consuming resources needed for Chains of Ice or other Rune abilities.
A Rime proc combined with Killing Machine creates particularly strong instant Frost burst.
Against grouped opponents, this combination can pressure several players simultaneously.
Avoid sitting on Rime for too long because another proc cannot provide full value until the previous one has been consumed.
Deathchill
Deathchill makes the next Icy Touch, Howling Blast, Frost Strike or Obliterate a guaranteed critical strike.
Use it to create a controlled burst rather than activating it randomly.
Howling Blast is an excellent Deathchill target when several opponents are grouped.
Frost Strike or Obliterate can be used when maximum single-target pressure is required.
Deathchill lasts long enough to prepare the correct ability after activation, so do not waste the guaranteed critical strike on an unimportant attack.
Unbreakable Armor
Unbreakable Armor increases Armor by 25% and Strength by 20% for 20 seconds.
This makes it both an offensive and defensive cooldown.
The Strength increase significantly improves burst damage, while the Armor increase provides additional protection against physical attackers.
Use it during a real offensive window when you can remain connected to the target.
Against melee teams, it can also be activated defensively while still increasing your counter-pressure.
Because the cooldown is only one minute, use it regularly rather than saving it indefinitely.
Death Grip
Death Grip is essential for controlling positioning.
Use it to pull ranged targets back into melee range after they create distance.
It can also interrupt positioning by pulling a healer away from a pillar or into your team's control.
Defensively, Death Grip can remove an enemy melee player from your healer.
Do not automatically use it at the beginning of every engagement.
Holding Death Grip until after Blink, Disengage or another escape often provides much greater value.
Mind Freeze
Mind Freeze is the primary interrupt.
Use it on important heals, crowd control or dangerous damage casts.
A successful interrupt locks the interrupted spell school, creating several seconds where the caster cannot use abilities from that school.
Against healers, this can create the opening needed to finish a target.
Avoid wasting Mind Freeze on low-value spells when a stronger cast is likely to follow.
Strangulate
Strangulate provides a ranged Silence and is useful when Mind Freeze cannot reach the target or when a longer period of spell denial is required.
Use it during coordinated burst to prevent a healer from responding.
It can also stop dangerous caster pressure while you reposition.
Stagger Mind Freeze and Strangulate whenever possible rather than overlapping both effects unnecessarily.
One can interrupt the initial cast while the other extends the period where the opponent cannot respond.
Anti-Magic Shell
Anti-Magic Shell is one of the strongest defensive abilities against casters.
It absorbs magical damage and can prevent many magical debuffs and crowd-control effects from being applied while active.
Use it proactively before incoming Fear, Polymorph or magical burst whenever possible.
Absorbing magic damage also generates Runic Power, allowing defensive timing to contribute to additional Frost Strikes.
Glyph of Anti-Magic Shell increases its duration by two seconds.
The longer duration provides a much larger window where the Death Knight can pressure casters without being easily controlled.
Icebound Fortitude
Icebound Fortitude reduces incoming damage and provides immunity to Stun effects while active.
Use it when the enemy commits major offensive cooldowns or when preventing a stun is essential.
It can also be used proactively to continue an offensive push through an expected stun setup.
Do not wait until health is nearly gone if enemy burst is predictable.
Frost has several defensive tools, so rotating them across separate enemy offensive windows is usually stronger than stacking everything together.
Lichborne
When included in the build, Lichborne provides immunity to Charm, Fear and Sleep effects and can break those effects.
It is particularly useful against Priests, Warlocks and Warriors.
While Lichborne is active, the Death Knight counts as Undead and can cast Death Coil on themselves for healing.
This allows Runic Power to be converted into emergency recovery.
If heavy pressure is expected, avoid spending the entire Runic Power bar immediately before Lichborne may be needed.
Death Strike
Death Strike provides an important defensive alternative to Obliterate.
Use it when survival is more valuable than maximum burst.
In WotLK, Death Strike healing depends on maximum health and the number of diseases active on the target rather than the amount of damage recently taken.
Maintaining diseases therefore improves its healing.
Against melee pressure or while your healer is crowd controlled, spending Frost and Unholy Runes on Death Strike can keep you alive until support returns.
Blood Tap
Blood Tap immediately activates a Blood Rune and converts it temporarily into a Death Rune.
Use it when an additional Rune is needed immediately for control, burst or survival.
Glyph of Blood Tap removes its health cost.
Blood Tap is particularly useful when the normal Rune cycle would otherwise delay a critical ability.
Do not use it simply because the cooldown is available.
Save it for moments where access to another Rune changes the fight.
Empower Rune Weapon
Empower Rune Weapon immediately refreshes all Runes and grants additional Runic Power.
It can turn one burst sequence into a second full Rune cycle.
Use the first set of Runes before activating it so the refresh is not wasted.
Offensively, it can provide additional Howling Blasts, Obliterates or Chains of Ice while also generating more Frost Strike resources.
Defensively, it can create fresh Runes for Death Strike or additional control.
Its long cooldown makes timing important.
Dual-wield pressure
Dual wielding provides frequent melee attacks and strong Killing Machine generation.
Constant melee contact also builds Razorice Frost Vulnerability quickly.
This makes staying connected to the target extremely important.
Use Chains of Ice and Death Grip to prevent opponents from freely creating distance.
Do not chase blindly into dangerous positions simply to preserve auto-attacks.
Maintaining pressure is valuable only when positioning does not leave you isolated from your healer.
Playing against casters
Against casters, use Anti-Magic Shell aggressively to deny control and magical burst.
Maintain Chains of Ice so the opponent cannot freely create distance.
Save Death Grip for important escapes when possible.
Use Mind Freeze for key casts and Strangulate to extend pressure after the interrupt.
Howling Blast allows damage to continue even when the target briefly moves outside melee range.
Hungering Cold can shut down several enemies at once when they stack around you.
The objective is to alternate disruption tools rather than spending all of them in the same few seconds.
Playing against melee
Against melee, use Frost Presence when additional durability is required.
Unbreakable Armor provides both physical mitigation and offensive Strength.
Chains of Ice can be used defensively to kite rather than simply keeping the kill target slowed.
Icebound Fortitude answers dangerous stun-based burst windows.
Death Strike provides additional recovery when your healer is controlled.
Once enemy offensive cooldowns have ended, return to aggressive pressure with Killing Machine, Frost Strike and Howling Blast.
Target switching
Frost can switch targets quickly because Howling Blast and Chains of Ice immediately apply Frost pressure.
Use Death Grip to create unexpected switches onto poorly positioned players.
Build Razorice stacks after connecting to the new target and use Frost Fever to activate Glacier Rot.
Do not spend every major cooldown on a target that is about to escape or become immune.
Coordinate switches with teammate crowd control so the new target cannot immediately retreat.
Multi-target pressure
Frost is especially dangerous when opponents group together.
Howling Blast damages enemies around the primary target.
Glyph of Howling Blast can apply Frost Fever across the group.
Hungering Cold can control several players simultaneously.
Pestilence can spread diseases when additional disease pressure is required.
Killing Machine Howling Blast creates powerful burst across several targets and is particularly effective in Battlegrounds or melee-heavy arena fights.
Glyph of Frost Strike
Glyph of Frost Strike reduces Frost Strike's Runic Power cost by 8.
This allows more Frost Strikes before the resource bar is exhausted and significantly improves sustained single-target pressure.
Avoid Runic Power capping so the cheaper cost translates into additional attacks.
Glyph of Hungering Cold
Glyph of Hungering Cold reduces the ability's Runic Power cost by 40.
Because Hungering Cold normally costs 40 Runic Power, the glyph effectively makes the control ability free.
This allows Hungering Cold to be used without sacrificing the Runic Power reserved for Frost Strike.
Glyph of Anti-Magic Shell
Glyph of Anti-Magic Shell increases Anti-Magic Shell duration by two seconds.
The extra time is particularly valuable against caster teams because it extends the period where magical damage and control are heavily restricted.
Use the longer window offensively to stay connected to casters or defensively to survive their cooldowns.
Glyph of Howling Blast
Glyph of Howling Blast is an alternative major glyph.
It causes Howling Blast to apply Frost Fever to every target hit.
This simplifies disease application and gives Howling Blast additional value during target switches and multi-target pressure.
It can replace Glyph of Anti-Magic Shell when offensive disease application is more valuable than the additional defensive duration.
Consumables and professions
Engineering is particularly valuable in PvP because Nitro Boosts provide another mobility tool and engineering glove effects add controllable burst.
Jewelcrafting provides flexible high-value gems and is another strong profession choice.
Flask of Endless Rage provides Attack Power when flasks are available.
Dragonfin Filet provides Strength, while Fish Feast is a general alternative.
Free Action Potion can provide temporary protection against movement-impairing effects where PvP rules and server settings allow its use.